Instant VM Recovery of Workloads to VMware vSphere VMs
One thing we try do here at vBridge is make the migration process from on-prem to our platform as seamless as possible. This becomes increasingly challenging when we talk about source servers being physical or residing on alternative hypervisors like Hyper-V or Nutanix AHV, where P2V or V2V is required.
The majority of our migrations are done using Veeam in some way shape or form. But now Veeam have just made this process a little easier in version 10 by enabling us to performing Instant VM Recovery of Workloads to VMware vSphere VMs. We have yet to use this feature for migration purposes, however Veeam Vanguard Rhys Hammond recently converted a regional DC from Hyper-V to VMware using just Veeam Instant VM Recovery… and here is how he did it.
With this latest Instant VM Recovery, Veeam can instantly recover any Veeam backup created by any Veeam product to a VMware vSphere VM. In other words, physical servers, workstations, virtual machines or cloud instance Veeam backups can now be restored to VMware. Veeam even handles the P2V/V2V conversion automatically with it’s own built-in logic. How good is that!
To get started, a backup was taken of the source Hyper-V VMs prior to the scheduled outage window. During the outage window, the source Hyper-V VMs being migrated are powered down and the Veeam backup job is run again to ensure all changes to the VM disks have been backed up. Once the backup has completed, the source VM should not be powered on again.
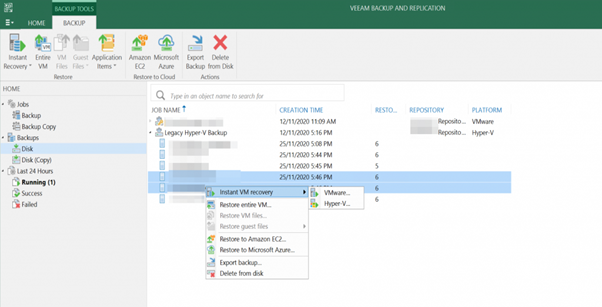
To start the migration process, browse to the backups, right-click the VM to be migrated and click ‘Instant VM Recovery’ then ‘VMware…’
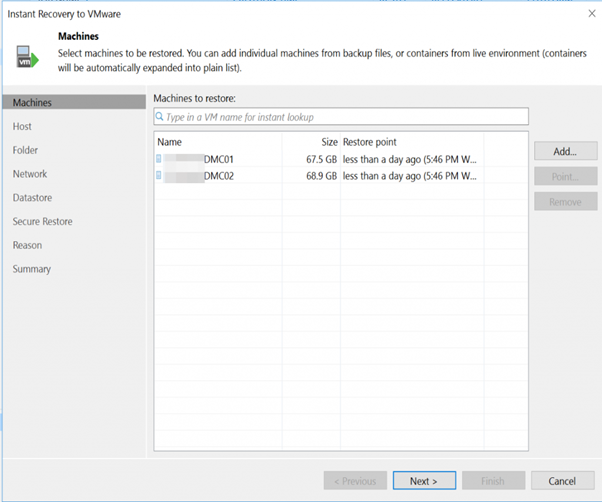
At the next screen, ensure the selected restore point matches the time for when the VM was shut down and the last backup ran.
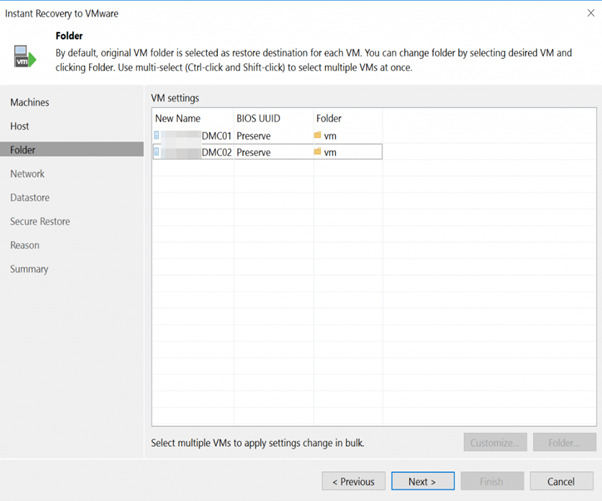
Select a destination folder for the VM.
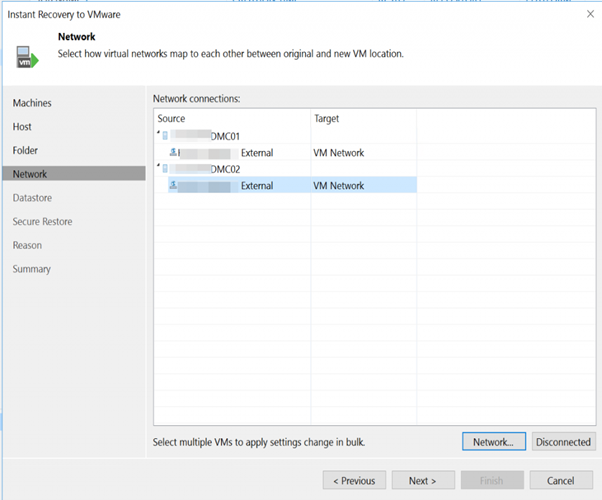
Select the target network appropriate for your environment.
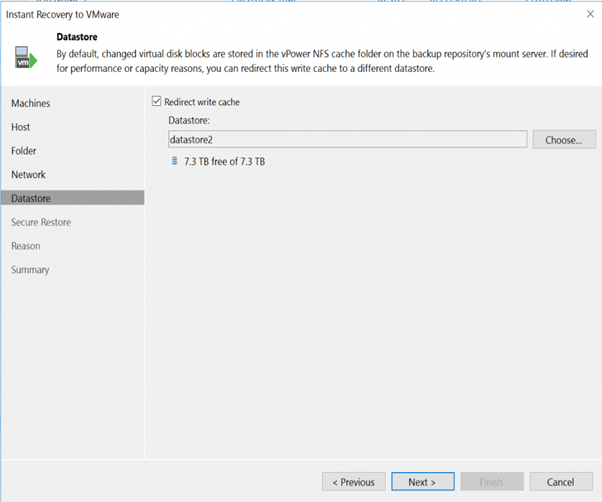
If you plan on powering on the VM before migrating it’s VMDK (storage vmotion) I recommend enabling ‘Redirect write cache’ to improve disk performance.
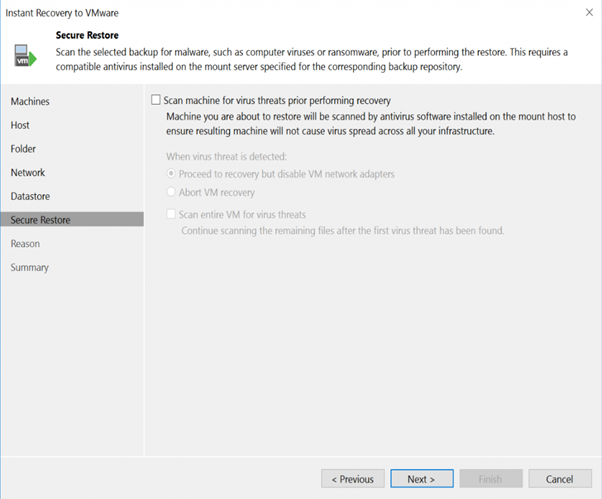
Skip the ‘Secure Restore’ option unless there is concern of malware.
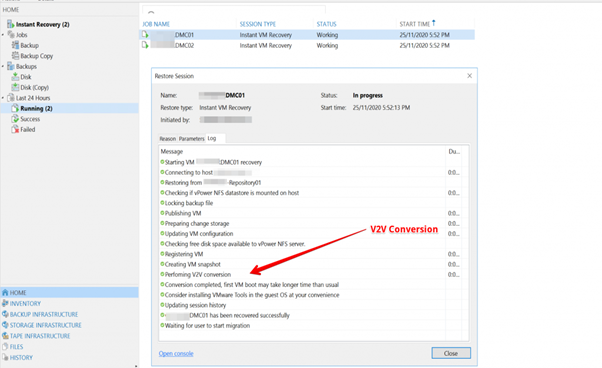
Proceed to summary, I recommend leaving the VM powered off until the VMDKs have been migrated to the production datastores. Click ‘Finish’ to start the Instant Recovery to VMware.
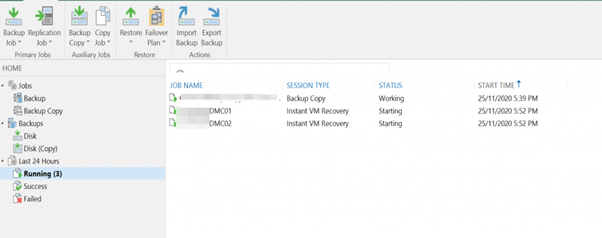
Notice the V2V Conversion action that is automatically performed by Veeam.
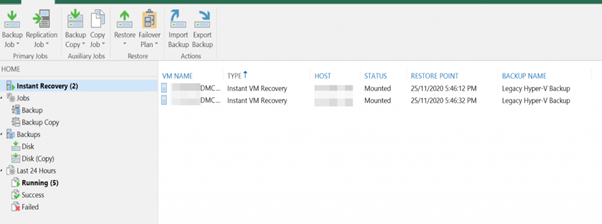
Veeam will show the Instantly Recovered VMs with a status ‘Mounted’.
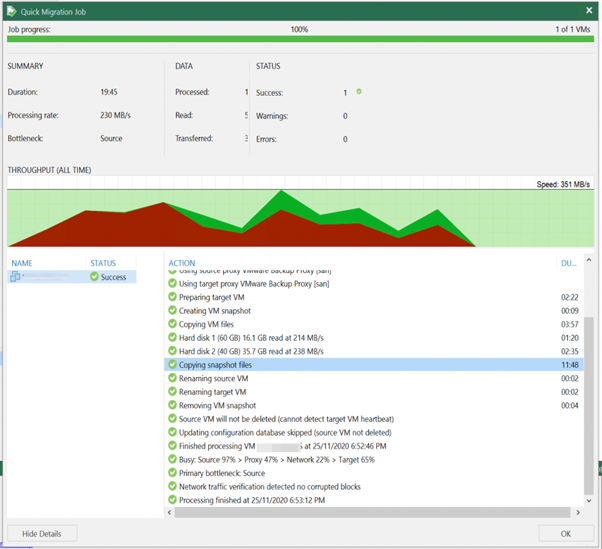
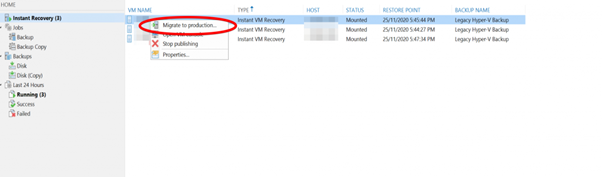
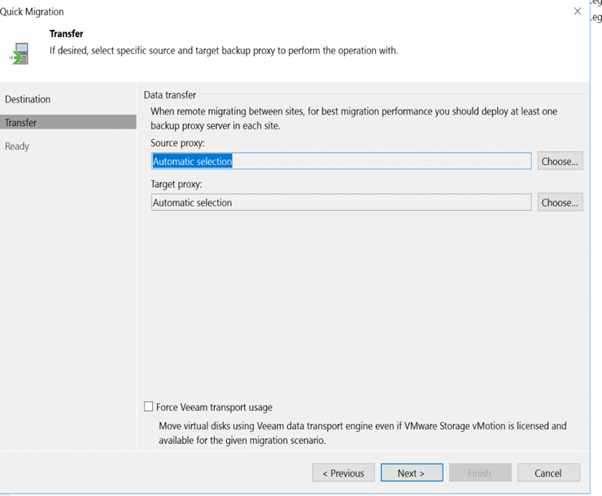
The next step is to perform a ‘Quick Migration’, this will migrate the VMDK from the NFS datastore across to the production datastore.
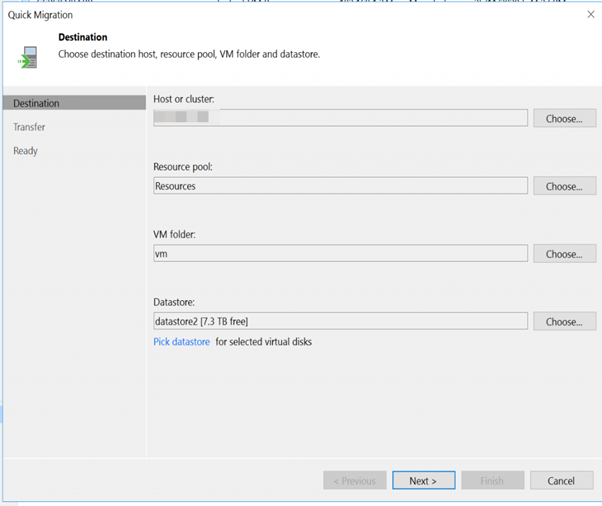
Note: [For Instant VM Recovery finalization] If you migrate VMs to the same datastore cluster that is used as the destination for redirecting virtual disk updates (the Datastore step of the Instant Recovery wizard), you must enable the Force Veeam transport usage check box at the Transfer step of the Quick Migration wizard. Otherwise, your migrated VM may be deleted.
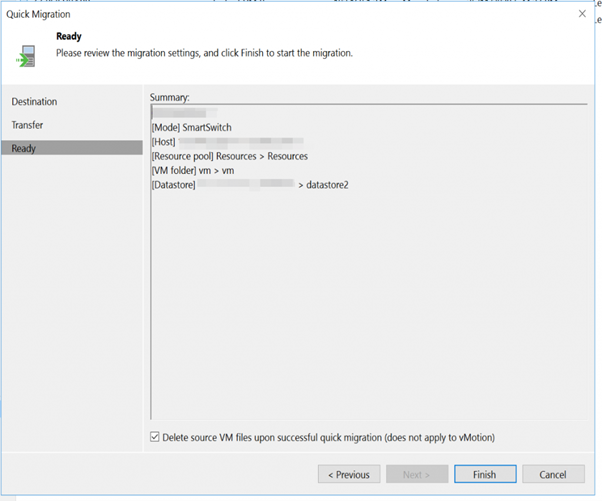
Once the Quick Migration has finished, the VM has been successfully migrated from Hyper-V to VMware and is ready to be powered on and tested.