HOWTO: Make Meaningful WSUS Reports
If you feel frustrated by WSUS reporting you’re not alone. It doesn’t usually tell you what you really want to know so read on because in this blog post I share with you how to create a better reports.
WSUS will telling you how many computers need in your environment need updates, but the problem is this is usually most of them – especially just after patch Tuesday. The latest updates come every month, or sooner, and large organisations take between 2-4 weeks to install these across their systems.
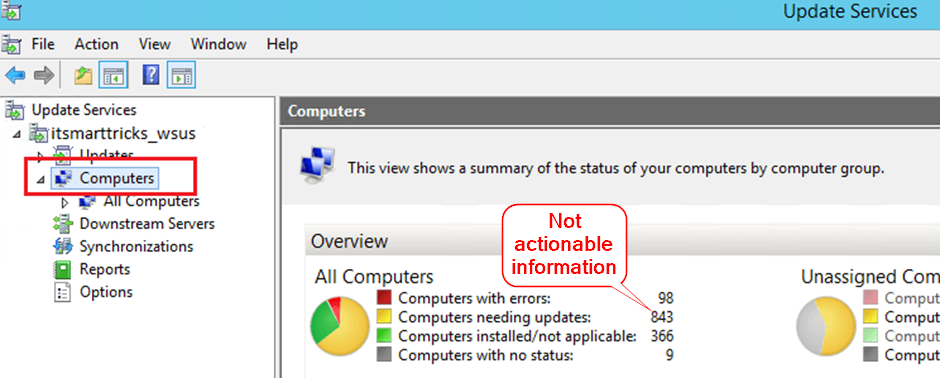
You already know that most computers need updates but how about a report telling you which computers still weren't patched 3-weeks after the update being released? This might breach your expectations about how quickly you expect updates to be installed.
“Which of my computers aren’t getting timely updates?”
Unfortunately, WSUS can’t tell you this out of the box, but in this blog post I show you how to make your own report that will. By directly accessing the WSUS database we can ignore updates only released in the last 3 weeks, but alert on any computers that were missing them after that.
Reports should give actionable insights - meaningful data that makes it clear what actions need to be taken or how one should think about an issue. The report we’re going to write is an actionable insight as you will probably immediately investigate why those updates still weren’t installed after 3-weeks. And if everything is working as it should, the report will be empty.
WSUS has been around a long time and in Microsoft 2016 article ‘Using WSUS Views’, they describe the WSUS database schema in enough detail that you can easily extract the information you need. Yes, the article is old, but still relevant today if you’re running on-premises WSUS.
To write the report you will need access to your WSUS database, and one way of getting started is to use Power Query. This is built into Excel, although the screenshots below are taken from a Power Automate flow. The relevant database/table views we will use are:
- PUBLIC_VIEWS.vUpdateEffectiveApprovalPerComputer. Returns one row for each update and computer along with the effective approval identifier when the computer belongs to multiple groups and the update is approved to some of those groups. This table takes into account that the approval time for individual updates differs depending on what group the update was approved for.
- PUBLIC_VIEWS.vUpdateInstallationInfoBasic. Returns one row for each update and computer if the computer has reported status for that update with the reported status information. You can use the PUBLIC_VIEWS.fnUpdateInstallationStateMap to get string representations (e.g., installed, failed) from the integer Status value exposed by this view
- PUBLIC_VIEWS.vUpdateApproval. Returns one row with approval information for each update and computer group if the update is approved to that computer group. The values of UpdateApprovalId are unique, and the ‘CreationDate’ column contains the date and time an administrator approved the update.
- PUBLIC_VIEWS.vComputerTarget. This view returns one row for each computer that connected to the WSUS server including computers that have been rolled-up from downstream servers.
By combining these tables, we can get the information we want. The steps I used were:
- he last 3-weeks. We’re only interested in approvals made more than 3 weeks ago. You can do this by first including the previous 3-weeks, then adding a ‘not’ to the M query.
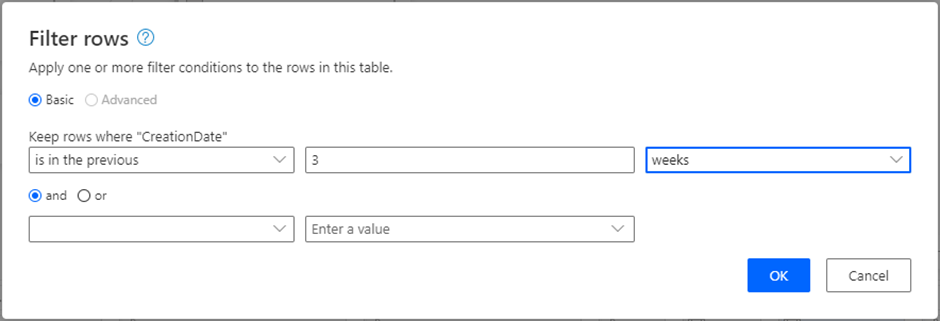
The screenshot below shows the adjusted M query:

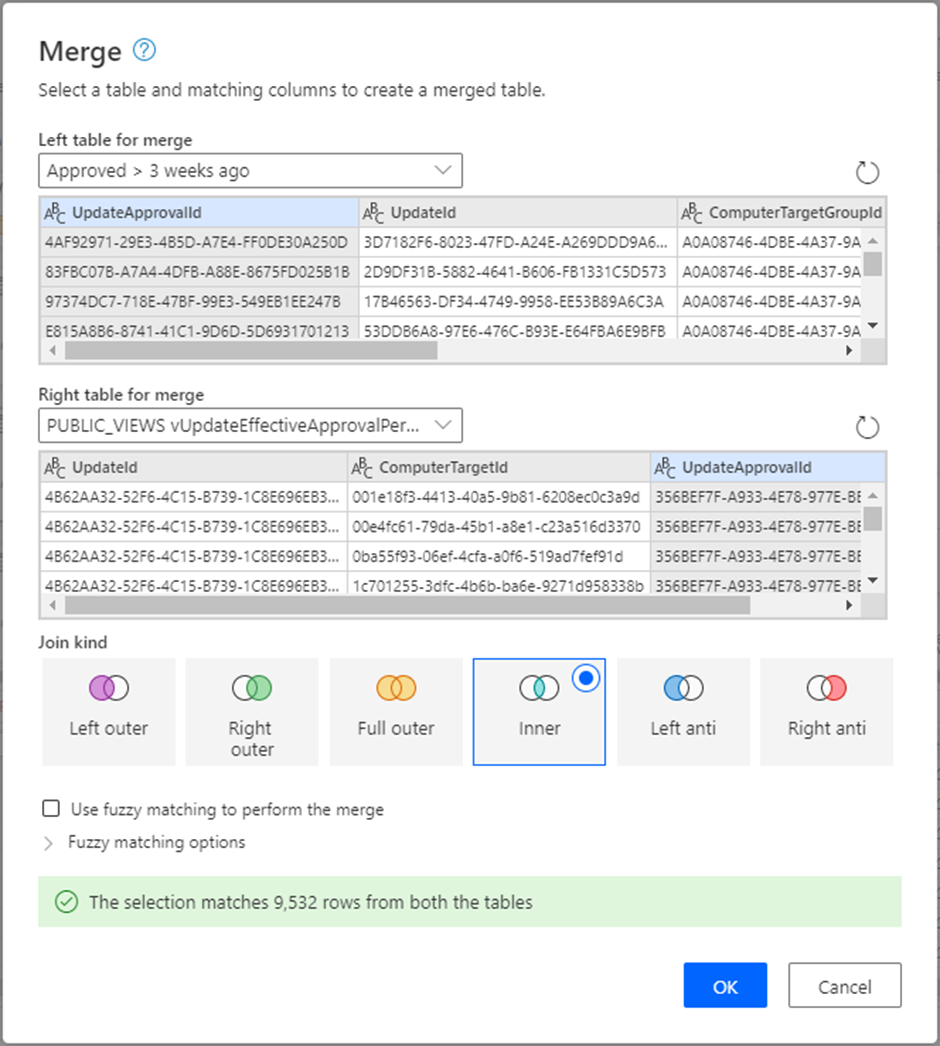
2. Merge the filtered table you just created with the PUBLIC_VIEWS.vUpdateEffectiveApprovalPerComputer view using an inner join. This results in a list of updates that were approved for installation more than 3-weeks ago and are applicable to at least one of our computers. I created a new table for this.
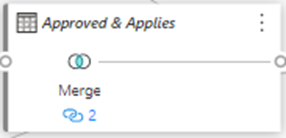
Rename the resultant table (I created a new one) Approved and Applies
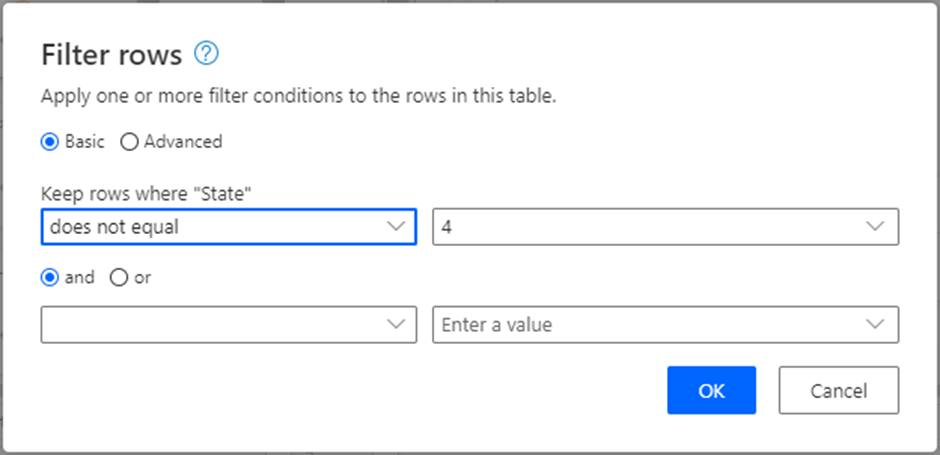
3. Now Filter the PUBLIC_VIEWS.vUpdateInstallationInfoBasic table to exclude all installed updates (these have an installation state = 4) because we are only interested in uninstalled patches. Rename this table as ‘Uninstalled Updates’. I named this table 'Uninstalled Updates'.

4. The last major step is to merge the two tables we just created. Do this by making an inner join merge of ‘Uninstalled Updates’ with ‘Approved & Applies’
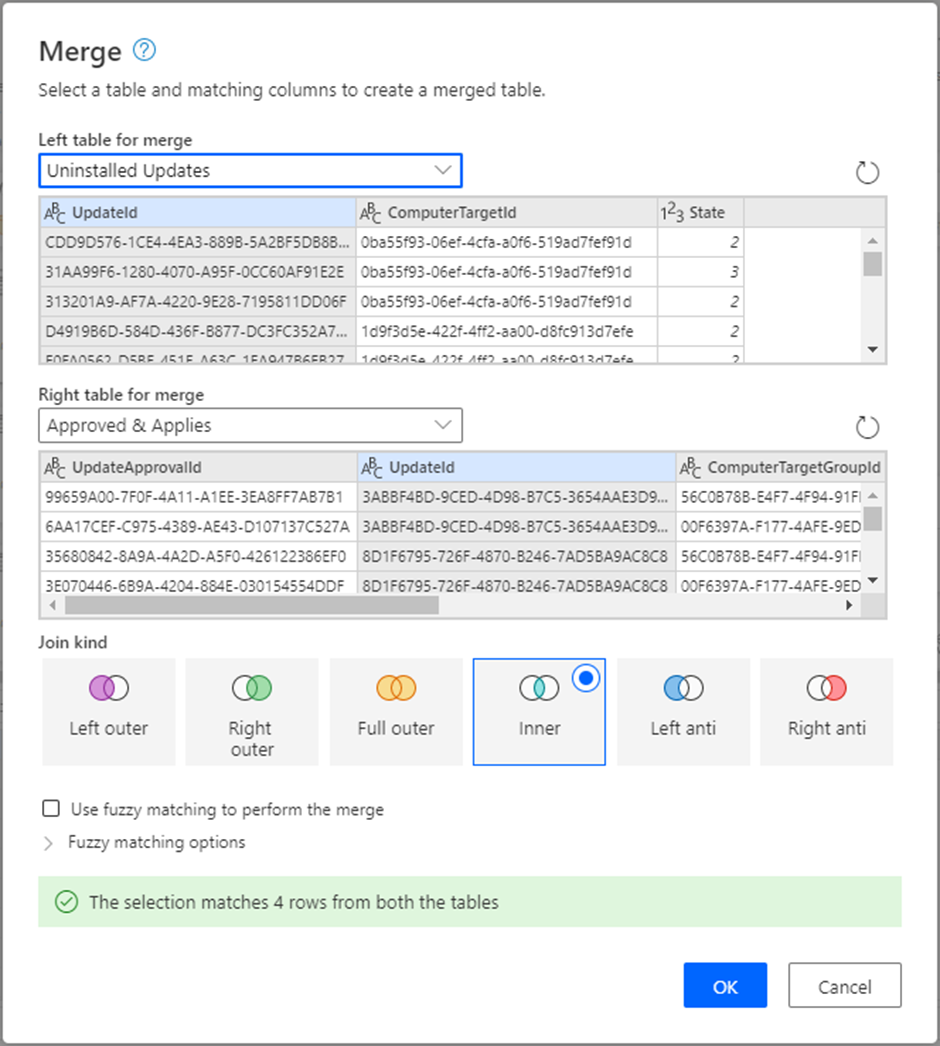
This results in a list of updates that were approved for installation more than 3 weeks ago, are applicable to at least one of our computers, and have not been installed.

5. The last step is to tidy up our data by turning the ComputerTargetId into a real name and counting the number of missing updates for each computer. Do this by making a left outer join of the above result with the PUBLIC_VIEWS.vComputerTarget view
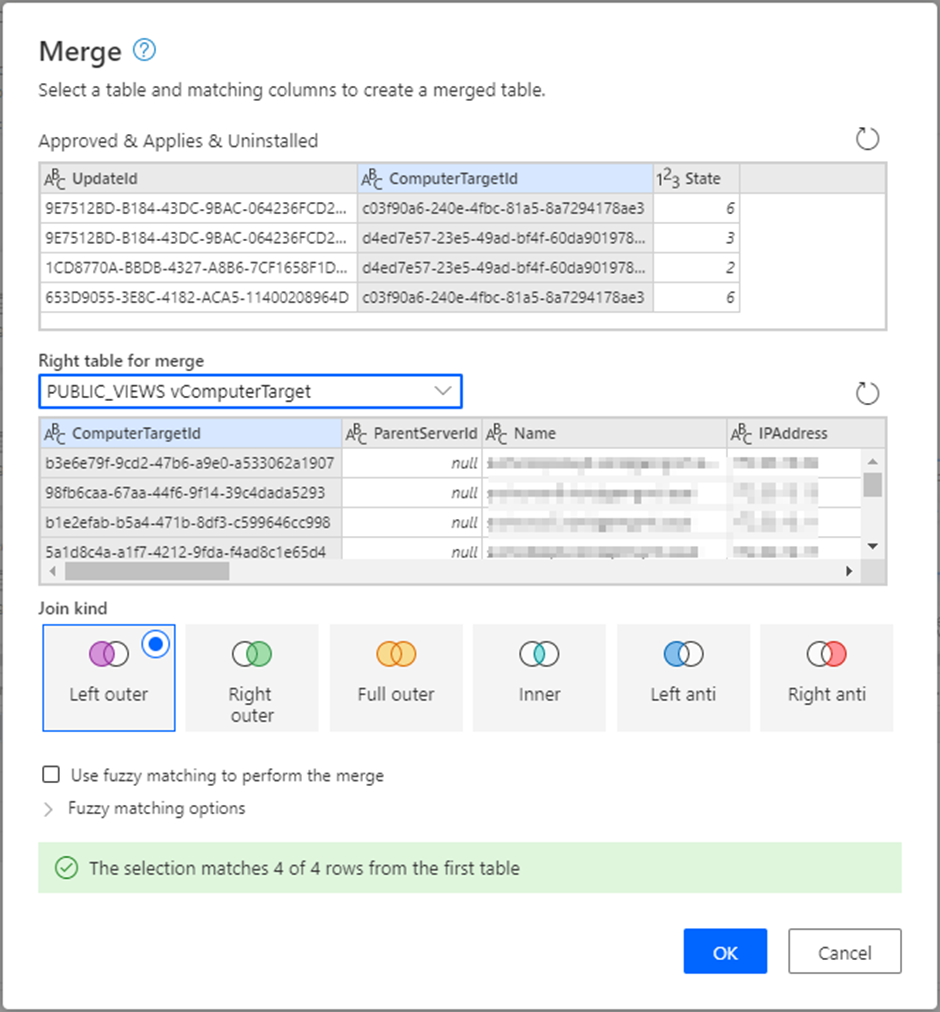
You can then expand out the Name field and use the ‘Group by’ function to count the number of updates missing on each listed computer


If you’ve come this far you can see how going directly to the WSUS database can be helpful and meet other needs. There is a lot of useful information in the WSUS database - for example the ComputerTarget contains firmware versions, hardware makes, models and IP addresses.
Please let me know if you found this useful, and happy report writing.
