#DeepFakeNews - Thanksgiving message from our CEO Todd Trump - Deepfaking with VMware Horizon and NVIDIA GPUs
We are doing a trial for a customer for some hosted workloads in the datacenter requiring GPU acceleration. This is delivered via VMware horizon to the client and for the proof of concept we have some NVIDIA A40 gpu's.
I jumped at the opportunity to "stress test" this platform. Immediately deciding to do a deepfake of our CEO, Todd Cassie onto Donald Trump. #sorrynotsorry
The team has the infrastructure up and running so from my Macbook I have installed the VMware Horizon client, connected up to this Windows Server machine back with the GPU enabled on it - pretty seamless and an absolute joy to use - no lag, audio and video streams as if it were locally, even the gaming benchmarks are super smooth to look at when it is doing its thing.
I can totally see professional use cases for this, lightweight portable machines for day to day use with all the heavy hitting done at the datacenter along with all the other other infrastructure like fast Pure NVMe storage, datacenter networking to access your large files, models datasets etc.
Enough business - time to deepfake.
Step 1 - Collect the source video
We need to get some source faces to train a model - in this case some of Todd and some of Trump.
Thankfully, there are PLENTY of Trump and as it so happens Todd did a video which is online when he was at a previous role from 2014. So I grabbed them both and saved locally.
Here is a snip from Todds one. Look at that face (and hair!), perfect for the stealing.
Step 2 - Install Faceswap
There are many ways to achieve this but the Faceswap application is opensource and has all the bells and whistles you might need to complete such a task.
Run through the setup, it takes a bit as it downloads a bunch of tooling to make it all work.
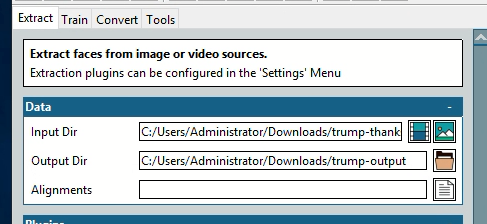
Step 3 - Extract Faces
For both videos we want this tool to extract the faces. To do this open up the extract tab and select one video at a time as well as a unique output directory. Below you can see my Trump video and a Trump Output folder.
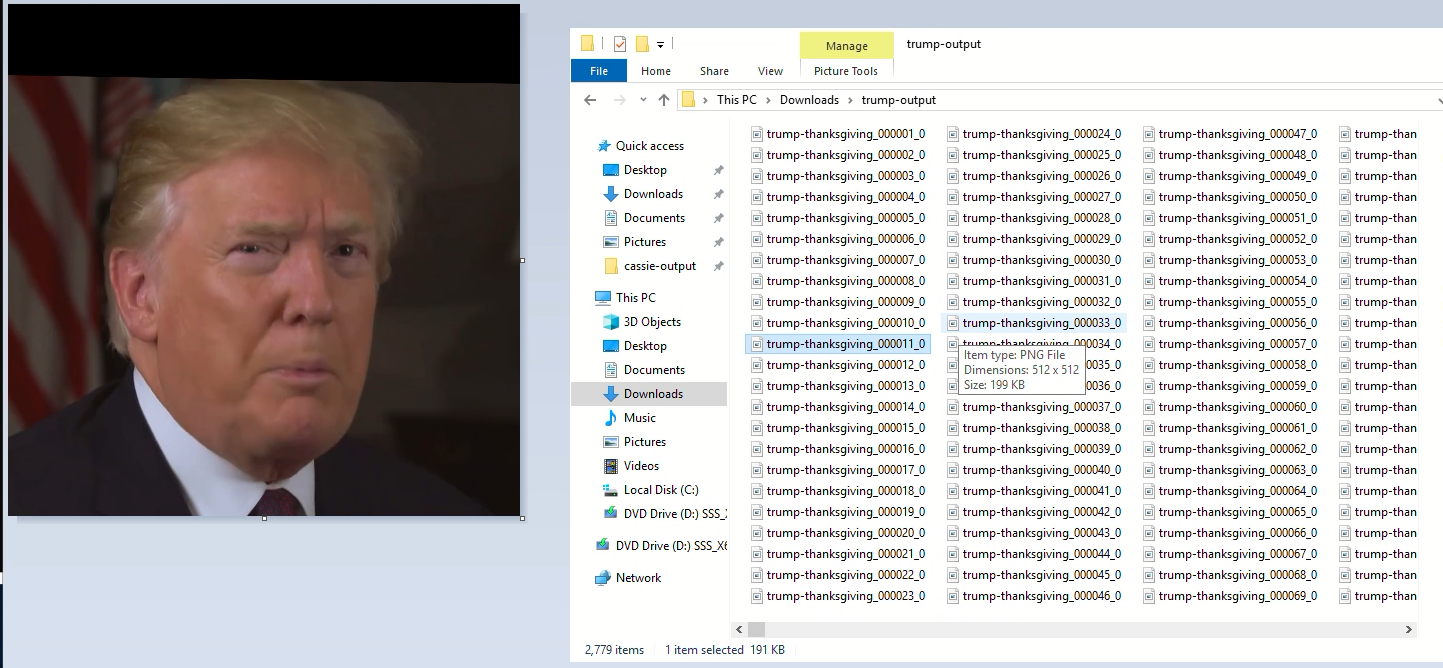
You can review all the settings and options and modify to your needs, I went with the defaults. Hit the go button at the bottom. The result is you will get a bunch of faces into the output directory all cropped up ready for the next step.
You will want to do this for both videos remember, different output directories.
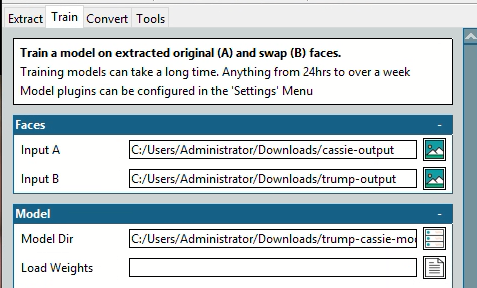
Step 4 - Train the model
Now we have a bunch of faces we we get to the more intensive task of turning Todd into Trump and Trump into Todd. On the train tab, select both Inputs and then an output directory for the model in case trump-cassie-model.
Review the other options, tweak as required. Hit the go button again then select the preview tab - this will update every once in a while and show you the training progress.
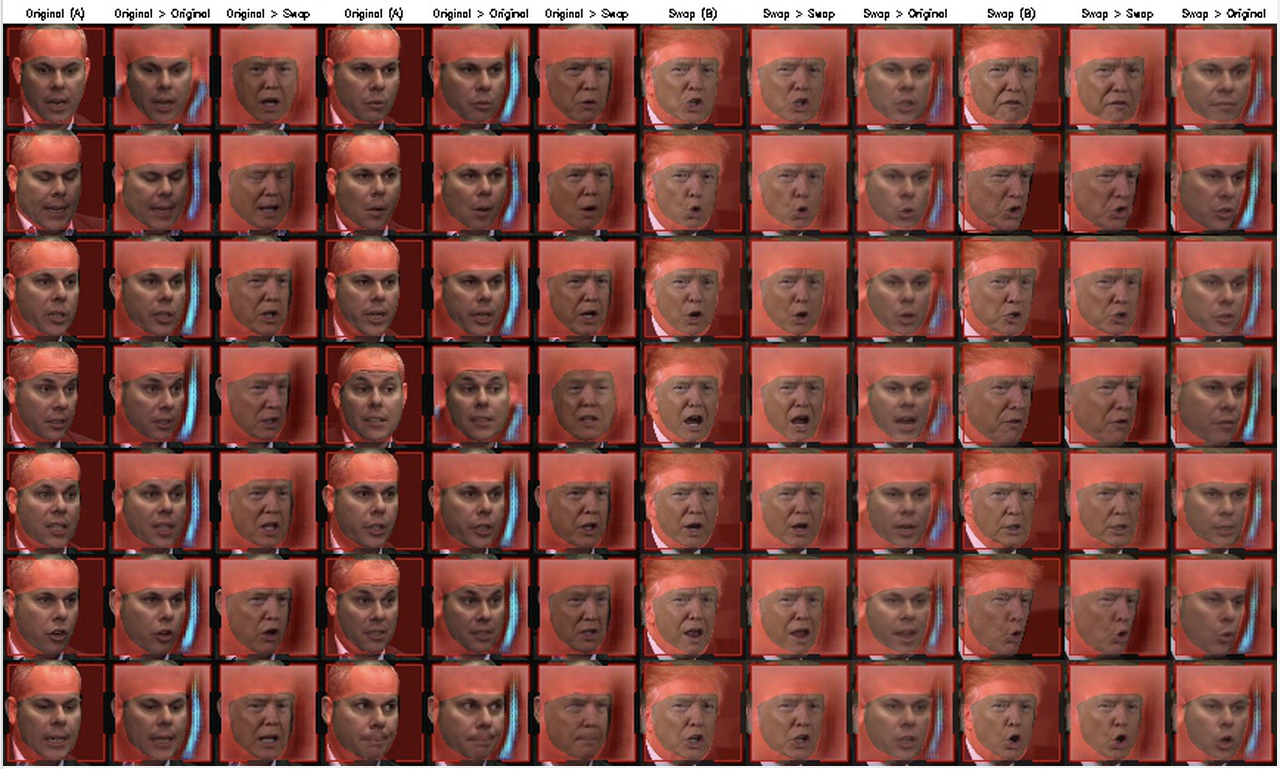
Here it is early on in the process, you can see they are still quite blurry, but be patient - it will get there.
You can see there are several columns what you are looking for is the Original columns, they are the frames from the real video. The Original > Swap column is the trained model of the swap, in this case Trump as Todd. It also trains the reverse to Swap > Original is the trained Todd as Trump model.
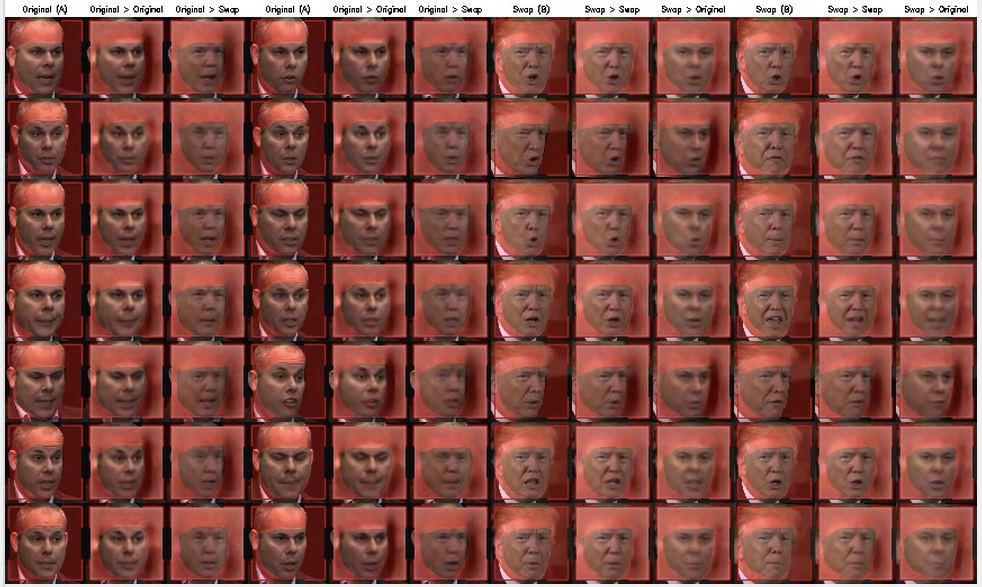
After around 15 hours I now have something good enough that we can carry on - this got to around 400,000 iterations of the process, it may take longer depending on your dataset but really you can stop the training when you are happy with the previews.
The other neat thing is you can effectively "resume" training, assuming you have the same settings / model location - this allows you to come back in and carry on if there was an outage to the equipment or more likely you want to get the model more accurate.
Step 5 - Covert the video
We now have a trained model and the video we want to perform the face swap on. Jump into the convert tab
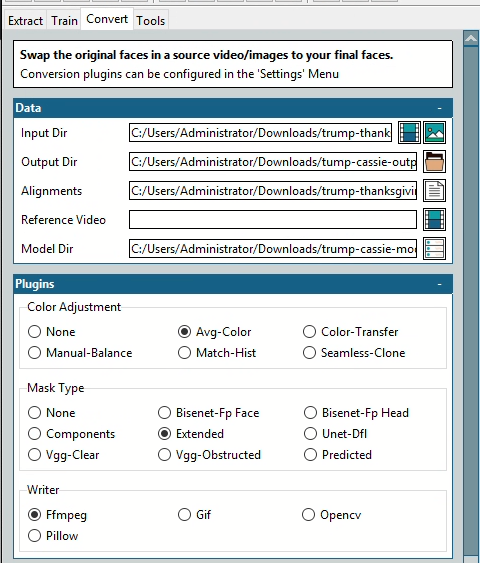
A few settings here
- Input dir can be static images/frames or a video, i selected the trump-thanksgiving video
- Output dir is where you want the swapped images or video to be placed
- Alignments is the alignments file that was generated back in the extract phase, be sure to use the alignments file that matches your input video
- Writer, you can choose to output the raw frames using opencv, i elected to go with ffmpeg and the output will be an mp4
Hit convert, it will then perform the magic.
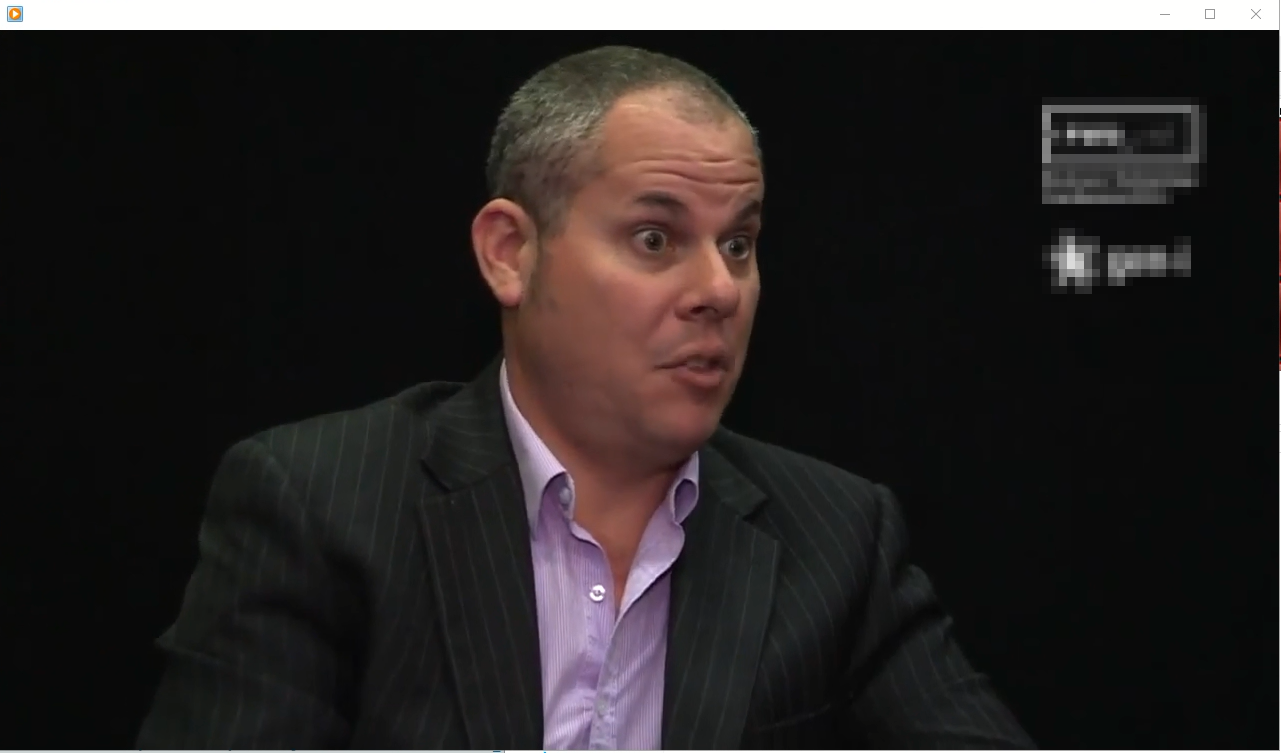
And here you go, a Thanksgiving message from our CEO.
And the other way, Trump onto Todd's video from a conference in 2014
Ok ok, so they are pretty bad 😂 ...... but.....
- We used only a single source video of Todd that was pretty low quality, same goes for Trump we only used a single video. We should have used multiple videos with different conditions (lighting etc) to give us the biggest dataset possible.
- We used a limited number of training frames, around 4000 for Todd and 2700 for Trump,
- We didn't clean up any of the images, mask things properly like you should
- We only trained for 15 hours
- We didn't experiment with the more intensive and time consuming extraction and training methods
- We didn't experiment with conversion settings at all to tweak blending
- This is my first time using the application, I learnt a lot.
Does it matter? Of course not, we are not trying to fool anyone here it was an interesting exercise to run through and test how usable GPU acceleration from the datacenter really is.
Verdict? Ben approved ✅
So much so I am now hoping this comes out of POC phase and I can move my virtual development environment too it. The horizon experience alone is far better than RDP.
Do you have any workloads of expensive, bulky, noisy, hot laptops or workstations you think you might be able to move to the cloud? Get in touch with us.